
Jumly
Latest posts by Jumly (see all)
- Using FTP client with WordPress (intro) - June 26, 2017
I have asked Ger, my technical WordPress Guru, to write an introductory post to FTP, or File Transfer Protocol. This was prompted by a message which pops up when I installed WP Super Cache (a highly recommended plugin to speed up your website) which read that the App permissions needed to be updated. To find out how to do this using FTP read the post from Ger. Thanks. donncha

What exactly is FTP and why is it useful?

FileZilla desktop shortcut
An FTP client is a convenient tool for transferring files to and from a web server, and deleting files from a server.
WordPress is software. According to WP Beginner, it comprises of code which is saved in folders and subfolders. When new plugins or themes are downloaded they are added to their own folders within the root (main) directlory. Normally you don’t need to worry about the backend which sits on your webserver (hosting). But there may be times when we need to access those files directly using an FTP such as FileZilla to for instance manipulate their permissions. On those occasions, it is not possible to achieve this via the WordPress control panel. Using an FTP client, we can directly change file permissions – as Donncha mentioned at the start this is necessary when we want for instance to implement ‘caching‘ on our WordPress site to speed up page and site load speed.
Caching is a process which, when deployed in a web server environment, serves web pages to a browser, faster than would otherwise occur. Web pages which are dynamically created, for example generated from a data source such as a database, are prime candidates for caching on a web server. WordPress pages fall within this category, and for that reason, a good caching plugin is a valuable addition to any site.
Download Plugin – WP Super Cache
Plugins are additional software compatible with the core WordPress code which add extra functionality. Search for the WP Super Cache plugin in the Plugin directory accessible from your Dashboard under Plugins and install and activate. When you do this message may appear:
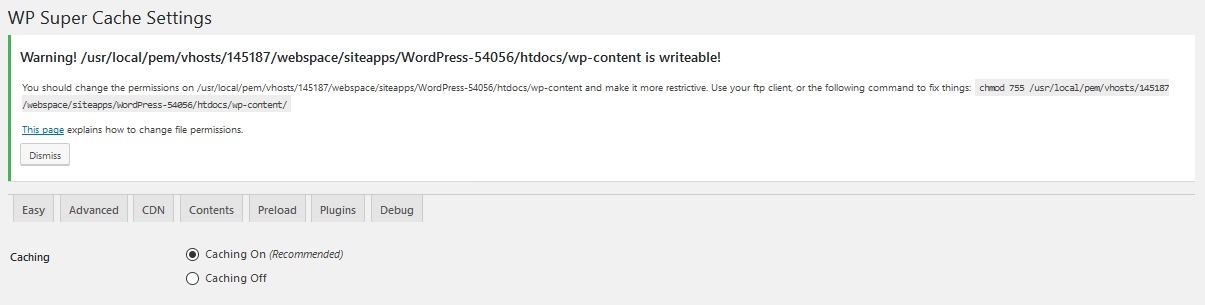
So here is what to do.
Firstly deactivate the WP Super Cache Plugin within WordPress via Dashboards >>> Plugins.
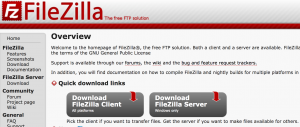
Download an FTP Client such as FileZilla
The FTP client we will use is FileZilla, available for download from http://filezilla-project.org – so click to download the Filezilla Client (not the server). You might need to check if your Windows is 32 or 64 bit.
When plugins are installed using the WordPress control panel, they will be placed in the following folder: /wp-content/plugins/ The plugin we’ve selected for this article is called WP Super Cache. When installed, it creates a folder called wp-super-cache located underneath the plugins folder.
Please note that we can also install this plugin by first uploading the files to our web server using FileZilla, and later activating the plugin inside WordPress. This is handy for quick installation of a suite of plugins at one time – the instructions will now assume that we are uploading the WP Super-Cache plugin using Filezilla.
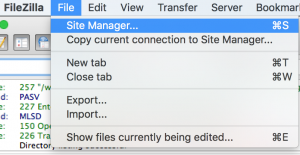
Files can be uploaded by first logging onto the web server using FTP credentials from our site – created inside the Control Panel of your Hosting Provider – this article on the Blacknight Solutions support site explains ‘How do I find my FTP details’. BTW, full instructions on how to use Filezilla are available via the HELP menu which navigates to this site: https://wiki.filezilla-project.org/Using
We then transfer the plugin files, previously downloaded from a plugin supplier site, such as WordPress.org.
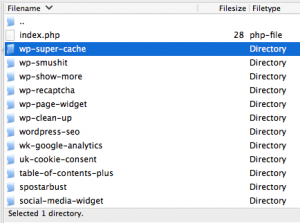
To view the directory on the web server, we can use FileZilla, which will allow us to view the files and folders which are located inside of the wp-super-cache folder.
The plugin requires the file advanced-cache.php to be created. Depending on the server settings, the plugin may be denied access to the folder to do this, in which case we must change the file permissions manually. This is the point at which we call upon FileZilla to help us with the task. Using FileZilla, we navigate to the folder. We want to change the directory permissions to 777. To do this, we right-click on the directory and select “File permissions…”.

Selecting File Permissions opens a contextual window where we can amend the permissions of the directory. For our purposes, we want to make the directory writable.
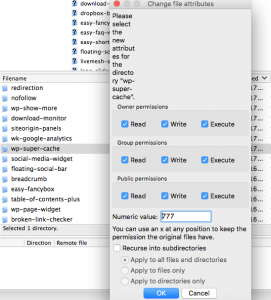
We do this by setting the permissions to 777.
777 means that the anyone can now read from, write to and execute files with the directory. For security reasons, it is not advised to leave files and folders with this setting unless there is a specific reason to do so, and for our particular installation, it is required only temporarily.
We now reactivate the plugin from the WordPress control panel. This causes the new file to now be created, as the folder permissions now allow this to happen.
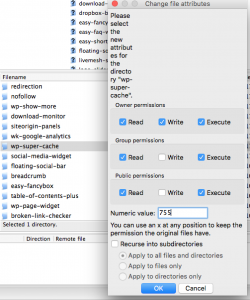
Then, go back to Filezilla, to re-set the permissions back to 755, so that the directory is no longer publicly writable. The error message should no longer be displayed by WP Super Cache in your dashboard – please note that you only have to do this ‘file permission’ adjustment once when you download the plugin for the first time.
This is just a brief example of using the file permissions functionality of FileZilla, but it may prove useful at some point when WordPress functionality alone may not serve all requirements.
Hope you found this article of interest and benefit.
Best regards
Ger (Jumly)
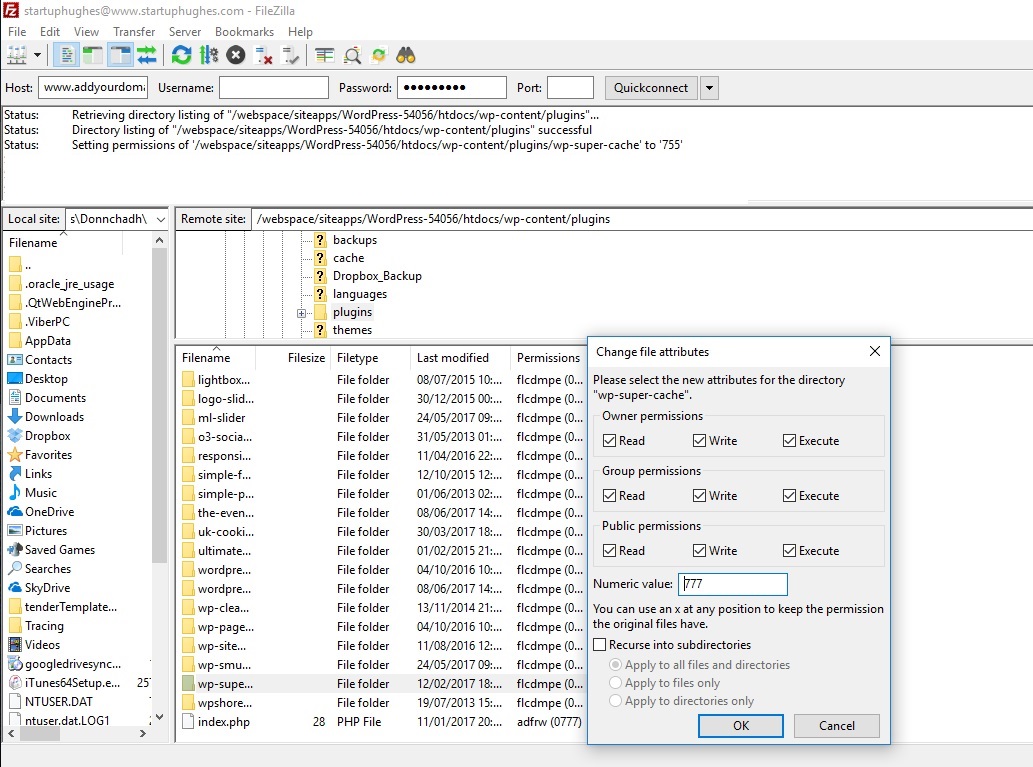
Note from Donncha – Filezilla on a windows PC or laptop
Ger uses a Mac. Filezilla might not look as pretty but it works just as same with a Windows PC or laptop which I use. Here is a screenshot in Windows (click to enlarge) showing the message that the File Permission has been changed.
I used a variation of Ger’s instructions:
- Download WP- Super Cache Plugin (deactivate it after seeing the error message)
- Opened Filezilla and logged in creating connection to my website
- Navigated to the WP Super Cache plugin within Filezilla. I used the address provided in the original error message that appeared in the WordPress Dashboard to guide me to – /webspace/siteapps/WordPress-54056/htdocs/wp-content/plugins … please note that your hosting will result in a different file structure so follow the error message.
- Changed the permission on the WP Super Cache Plugin to 755
- Got an Error message that this was not allowed.
- So I contacted Blacknight. They responded immediately and instructed me to change a setting in my hosting. I did, and repeated steps above. Permissions change now worked.
- Activated the Plugin within WordPress
- Back in Filezilla I reset the permissions to 777.
- Job done – and this post is ready to be published.
Thanks to Ger Coyne for his time in completing this guest post for me- it goes without saying that I value his expertise in all things web and would recommend his services.
Comments, and shares on social media welcome
regards
donncha (@donnchadhh)