
Donncha Hughes
Latest posts by Donncha Hughes (see all)
- Adding Facebook Page Feed and your Twitter Timeline to your WordPress blog (updated 2020) - December 4, 2020
- Working with Images for your Website - April 14, 2020
- How to get an email address to match your website URL? - March 31, 2020
Last week a client sent me an email asking how she could ‘save’ a brochure as a picture so that she could use the image in a presentation for a potential customer. She had included the brochure as an attachment and it took me all of 5 minutes to send her back what she needed. This got me thinking that the ability to work with images and other media is very important for anyone looking to manage a business website. This is a two part blogpost that aims to set out a few things that I have learned about ‘working with images for your Website’. It is two parts as it is a big topic. The second part will discuss how to insert Media in WordPress; how to use the Media Gallery; and my experience of a very small number of the many image and media plugins available in WordPress. This first post is where do you get the images in the first place and how do you edit them to your requirements.
Starting point: I am not a graphic designer
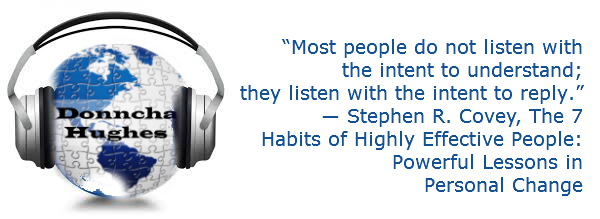
Everything I know about WordPress and now about images is self-taught … figured out when I needed to and keeping an eye out for new developments. I would consider myself a skilled ‘image manipulator’ whereby I can take a photo or a graphic that someone else has created and manipulate them for use in my web projects. Through the use of different tools, I can do things like adjust colour and sizes, and combine images and change the shapes and positions of different elements of the graphic; and add text. Here is a (clever) image that I created for a blogpost about Listening on my other website.
A graphic designer has illustration skills whereby they can create graphics from scratch – starting with a blank slate using image-editing software the most popular (and expensive) being Adobe Photoshop. The advantage of using a graphic designer like Louise Lawlor of Blink Design in Limerick is that they can create files that can scale (more on SVG or Vector files below). So if you have a brand logo it will appear perfect as a small image on the web or on a big sign on a building. The work will also have a higher creative quality.
Most professional web designers like Bad Dog in Galway also have graphic designers in their team and could create a professional logo if you have a good idea of what you are looking to achieve. The other option is to use a freelance marketplace such as Fivver.
Using Images on Your Business Website
Within WordPress there are lots of occasions to use images and other media.
- Header image for your website
- Images in a Slider
- Display images in the Sidebar and Footer
- Background images
- Images presented in pages and posts to include Galleries
- The featured image which is shared with Social media posts
- Add your Favicon or Site Icon …. an icon used to decorate your site in the bookmarks and tab bar of browsers.
Visitors to websites expect the experience to be visually appealing and knowing how to ‘manipulate’ images is a key skill.
Before I discuss sources of images for your website and working with sizes and how to edit images, a quick word on file types.
File Types – Quick overview
Most people know that a Word document is saved as a .doc; and that a PowerPoint Presentation is a .ppt. Files are saved in formats so that when you go to open them again, the computer knows which package to use to open them.
- A pdf is a document that can not be edited by the receiver. So if you have a Word document or Powerpoint presentation it is good practice to save it as a pdf (in the File >> Save As and change file type) before sending it to someone. I also use Cutepdf which is a neat free application that allows you to print any document as a pdf (useful for printing individual Excel spreadsheets as pdfs for example). There are lots of pdf reader applications and Adobe have premium Pdf readers which have lots of functionality to include the ability to fill in forms.
- A JPEG is probably the most recognisable file format for an image used on the web. These can be opened and manipulated in Paint.
- A PNG is very similar to a JPEG but is very useful as it probably won’t have any background. If you have an image in PNG it will ‘blend’ into the background of a presentation, word document and your website as per the image below. These can be viewed in Paint but can not be changed ie the new file will be converted to JPEG.
- An SVG file is a format used by graphic designers which is scalable ie the quality of the image or logo is maintained at all sizes (small and big). There are free online file converters if you want to convert a PNG or JPEG to a SVG and vice versa. Here is a super post about these SVG or Vector files written by Pixabay – which refers to a free progremme called Inkscape for editing SVG files. Pixabay is a source of free high quality images – over 690,000 free stock photos, vector and art illustrations.
- An EPS is a file format used by Commercial Printers like SNAP …. just keep on file but you won’t be able to open them.
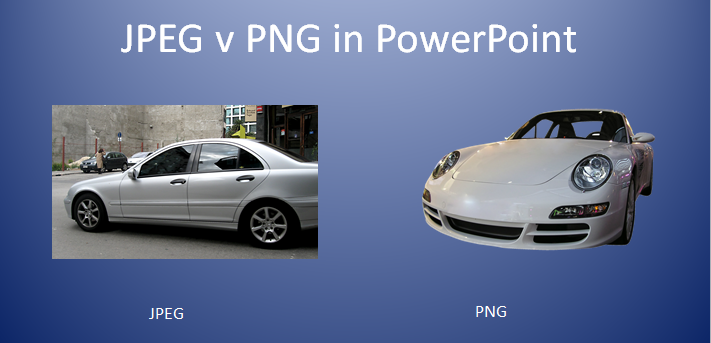
Image Sizes
There are two inter-related aspects to image size.
#.1 File Size
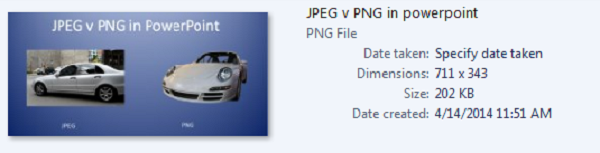
Small file size images allow your website to load faster. Most digital cameras and smartphones take images that are 2MB (you can play with the sizes to make them anything from 1MB to over 10MB) on the basis that the higher the MB the higher the quality when you print them professionally. But websites are different. Smaller images work better as they improve site speed. Most images should be under 1MB and indeed the Cars image above is 202KB (20% of 1MB) and is of sufficient quality for viewing on screen.
Your File Manager will tell you the file size of your image.
#.2 Image dimensions or pixels
The file properties will also tell you the dimensions which is the second key aspect of image size as measured in pixels.When working with images in WordPress, pictures can be displayed as a Thumbnail (150 width x 150 height); medium (300 x 225); large (550 x 412) or full size and these standard dimensions can be changed for your website if you wish. So when you want to display a thumbnail of an image, you select the thumbnail format as the image is inserted. Using standard sizes gives consistency to your site. In any event most WordPress templates will automatically resize the display size of your image so that full size images are displayed properly to your viewer.
Changing Image Size
It is useful to know how to change the dimensions of your image so that the image file size is reduced so that the webpage loads faster (image quality is not noticably reduced). More importantly some images are required to be of certain dimensions for optimal display.
- In this particular website, the FEATURED image, has to be 1000 pixels wide to display properly. This is the image that is displayed with the blog excerpt on the blog home page where all the posts are listed.
- Similarly, many HEADER or banner Images have to be set dimensions to display correctly – the exact dimensions that apply will be provided in the instructions for the chosen Theme.
The inbuilt Image Editing functionality within WordPress can be used to edit an image after it has been uploaded. So an image can be cropped, scaled, rotated and/or flipped. This is useful as there is an option to make changes to all image sizes; just to the Thumbnail size; or to all sizes to exclude the Thumbnail. And I was reading last week that WordPress 3.9 is going to make working with and resizing images even easier (pull and drag).
But I still like to know how to edit an image before uploading to WordPress using stand-alone software applications. I use a small number of tools:
#.1 Royalty-Free Images
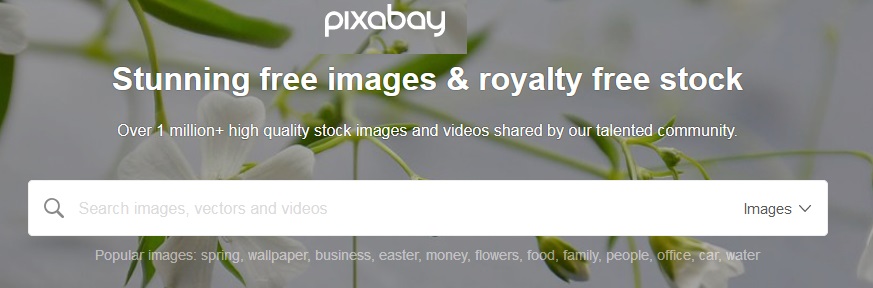
For your website, I would suggest sourcing images or photos that are free to download and royalty-free – the website Pixabay.com is my favourite source of royalty-free images. At this point, I must stress to first-time web creators that images can not be taken from other sites and used freely as they may be copyrighted. This article lists 46 of the Best stock photography websites (free and paid).
#. 2 Take a ScreenGrab and copy into Paint
A screengrab (screen capture or screenshot) is a neat way to take an image of what is on your screen. In Windows 8 or 10, hold down the Windows button at the same time as Insert (Prt Sc) or in Windows 7, it if Function (fn) and Insert (print screen). You might be working in Word or most likely PowerPoint and want to save what is on screen as an image. Open up Paint and paste in the Screenshot (Cltr + V) and then you can:
>> Save >> the image to a folder on your hard drive (as a JPEG).
>> Select >> the part of the image that you want and crop the image or delete part of the image
>> Rotate >> the image
>> Resize >> the image {remember resizing changes the pixels and in turn the filesize of the image)
As well as add text and shapes in terms of basic editing – but I prefer to do all this in Powerpoint before I take the screengrab as there is a greater range of fonts and text can be added with a background which is partly transparent as per the featured image for this post.

At the top of the post I mentioned that I was asked how to ‘save’ a brochure as an image. You can not really but what you can do is open the pdf and take a screengrab. The printer/ graphic designer would probably give you all original images as part of the project.
#.3 – Easy to use (learn) editing tool for resizing and adding fonts and Creating Logos
There are plenty of online (browser based) tools for beginner (and advanced) level image and photo editing like Pixlr, PicMonkey and Online Image Editor (free) which are great for adding text and resizing images. I suggest watching a few YouTube videos to learn how to use advanced features.
Another one which is very easy to use is Logomakr.com which facilitates the creation of simple logos (my blogpost with instructions /video) by adding text to a large and very good search databank of graphics. Other icons can also be used by dragging them in from your desktop – a good source of icons is from the noun project.
BTW, there are plenty of mobile phone apps that also offer image editing to include Google Photos.
#.4 Advanced editing using Open Source programs
GIMP is an example of an open-source (free to download and use) program that is a good alternative to Photoshop. These offer much greater functionality to manipulate photos, specifically:
– To convert a JPEG with a background into a PNG without a background
– To add what are called layers so that images can be blended together nicely to create nice effects (yes that is Santa coming out of the globe that is my logo and those are snowflakes)

I now use the Paint.net application for most of my quick image editing (to convert jpeg images to png) projects.
#.5 Optimise your images
As I mentioned earlier website performance benefits from correctly sized – and what is referred to as ‘Optimised’ images. One could use a website called Image Optimizer.net to individually optimise images (for free) – or download a free to download and use a plugin called Smush to resize and compress images on your WordPress site without reducing image quality. It even smushs as you upload your images.
In conclusion
Working with images comes naturally to me now – after lots of practice. I think the visual appeal of your website is so important and it is worth spending time to add images to your pages and posts. I am particularly proud of my Slideshare presentations like the one below which I think has a strong message because of its visual appeal.
As always I hope you found this blogpost of interest and value. Appreciate any comments … Part 2 of this post discusses WordPress functionality such as inserting media and galleries and how to add a slider
regards
donncha (@donnchadhh)