
Donncha Hughes
Latest posts by Donncha Hughes (see all)
- Adding Facebook Page Feed and your Twitter Timeline to your WordPress blog (updated 2020) - December 4, 2020
- Working with Images for your Website - April 14, 2020
- How to get an email address to match your website URL? - March 31, 2020
Contact Form 7 is a superb plugin that I highly recommend during my Two and a Half Day Build your Website using WordPress programme. It is a great way to introduce the concepts of Plugins and Shortcodes. This post will provide instructions on how to configure the standard form.
Contact Form Example
Here is a screen grab of the contact form on my business advice website. It allows someone on your website to send you an email without leaving your site.
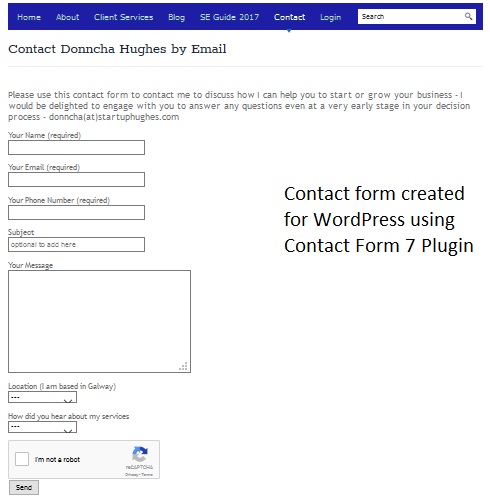
As you can see it requires the visitor to the site to provide some additional details with the answers selected via a drop down menu. And yes this email can be delivered direct to your mobile phone email application.
To configure Contact Form 7
The Contact Form 7 plugin has an excellent instruction guide. The central concept is that a Contact Us page is first created, then a contact form is created, and then the contact form is embedded into the Contact Us page. A form can appear on several pages and indeed via a widget in the sidebar.
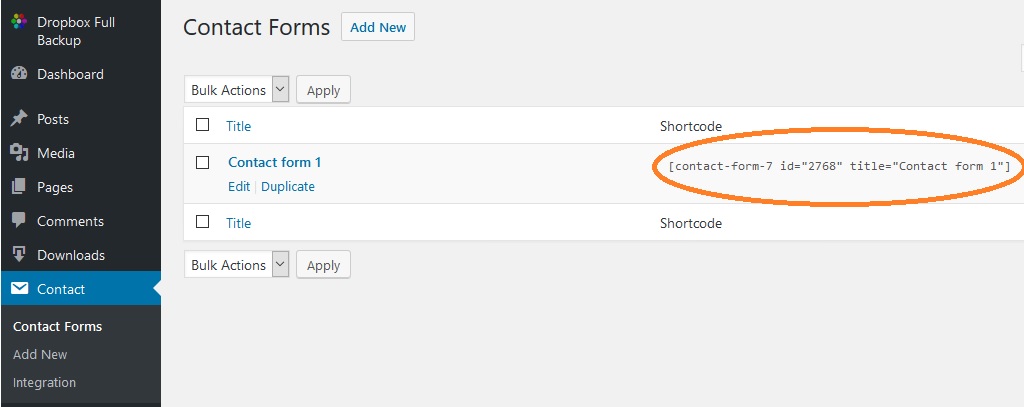
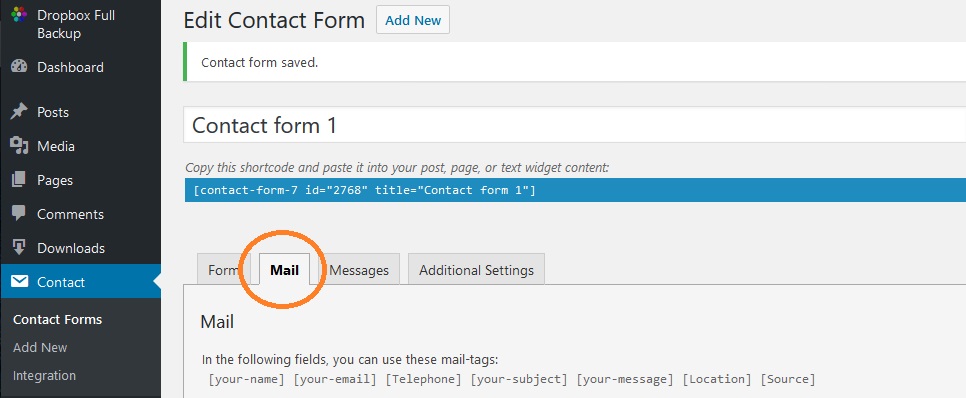
Each contact form has its own specific ShortCode which is copied into the Visual Editor of the page. It will be in this ShortCode format:
[co ntact-form-7 id=”2768″ title=”Contact form 1″ ]
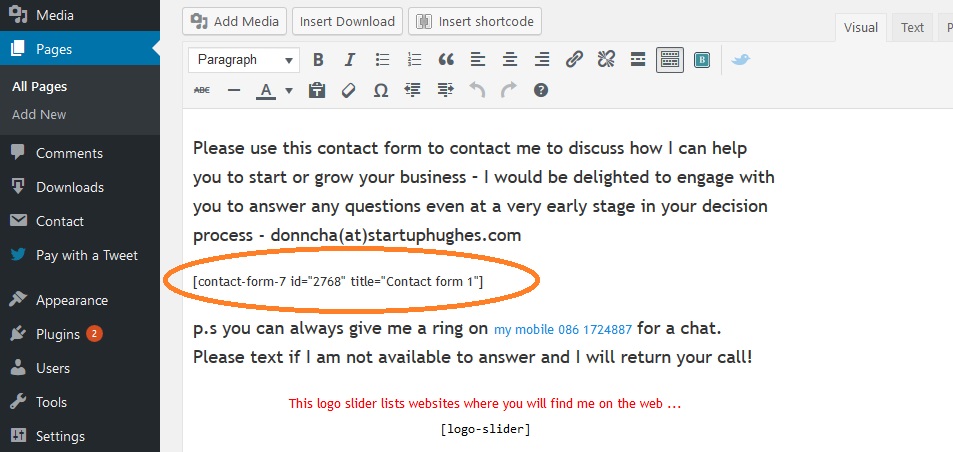
Text and/or images can be added above and/or below the contact form. As you can see other shortcodes such as the Logo Slider can also be used on the same page. But the advice is to keep a Contact form as distraction free as possible.
Semi Advanced Features of Contact Form 7
There are a number of alternative Contact Form plugins for WordPress. There are also many premium form building services which are ideal for managing leads. I used a Google Form for a short as it would automatically collate all the responses in a Google document. But I reverted back to Contact Form 7 as the number of people contacting me decreased dramatically during that experiment with Google Forms. I am not entirely sure why.
#.1 Captcha solution to prevent spam
This is to add a button at the end of each form whereby the visitor has to click a box to confirm that they are not a robot before sending the email form. Contact Form 7 integrates very easily with Google reCAPTCHA. One has to install the WP-reCAPTCHA plugin and set it up. This requires visiting the Google reCaptcha API key administration to get a public and private key which are copied into the settings of the plugin. When configured the CAPTCHA option is available within Contact Form 7.
UPDATE January 2019 – reCAPTCHA v3 doesn’t need a CAPTCHA “I’m not a robot” checkbox to work, so [recaptcha] form-tags are no longer necessary. The WP-reCAPTCHA plugin is also surplus to requirements. For more see this Contact Form 7 blogpost.
#.2 Complete additional fields with Drop Down Menu
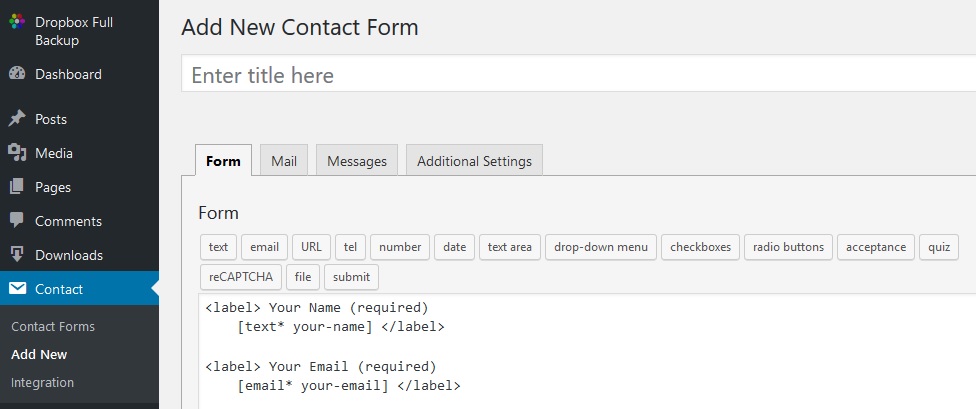
When a new form is created it has 5 elements as displayed below. Some code needs to be added if we are seeking additional information to be submitted by the visitor. There are a series of steps to be followed to ensure that the additional information is included in the email that is received –
<label> Your Name (required)
[text* your-name] </label><label> Your Email (required)
[email* your-email] </label><label> Subject
[text your-subject] </label><label> Your Message
[textarea your-message] </label>[submit “Send”]
The extended form in the real example has a few more elements as follows:
<label>Your Name (required)
[text* your-name] </label><label>Your Email (required)
[email* your-email] </label><label>Your Phone Number (required)<br />
[tel* Telephone] </label><label>Subject
[text your-subject placeholder “optional to add here”] </label><label>Your Message
[textarea your-message] </label><label>Location (I am based in Galway)
[select Location include_blank “Galway City” “Galway County” “Tipperary”]</label><label>How did you hear about my services<br />
[select Source include_blank “Web Search” “Word of Mouth” “Referral”]</label>[recaptcha]
<label>[submit “Send”]</label>
You can see this “code” in the image below:
To add the code, you select the Grey TAB that contains that TAG (or label) that you want and complete the form that pops up. Here is a screen grab of the Contact Form to add the Drop Down Menu TAG.

To add the Dropdown Menu to Contact Form
Click on the blue button to INSERT TAG. This can be edited if required afterwards. The pop up relating to URL reminds that
To use the value input through this field in a mail field, you need to insert the corresponding mail-tag ([Location]) into the field on the Mail tab.
In my case I added 3 elements as per image below – for Telephone, Location and Source (where did they hear about me) – so I have to add three Code Elements to the form in the MAIL TAB.
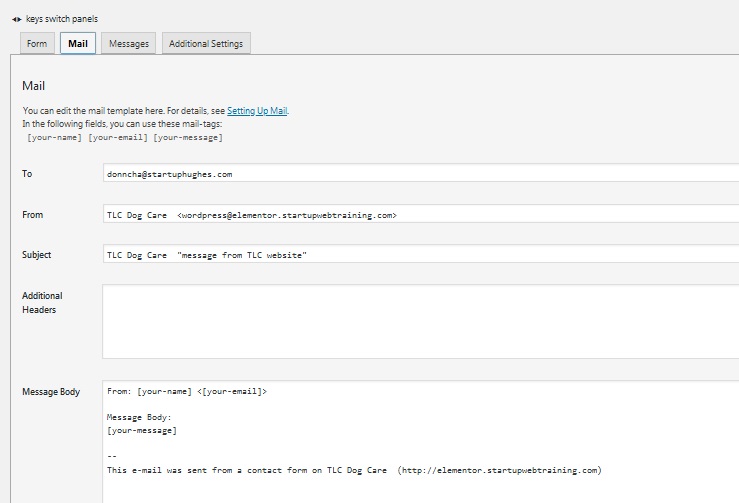
When you scroll to bottom of the screen the message body has to be edited as follows:
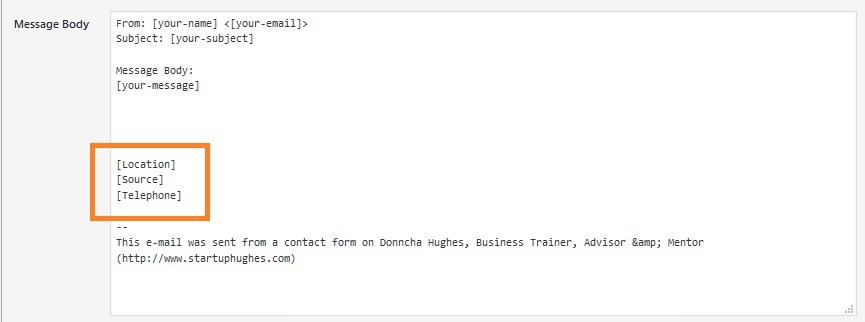
So now every time someone contacts me I have 3 valuable pieces of information which I can check out before I respond to the correspondence. For the record here is how the middle part of that pop up form needs to be completed:
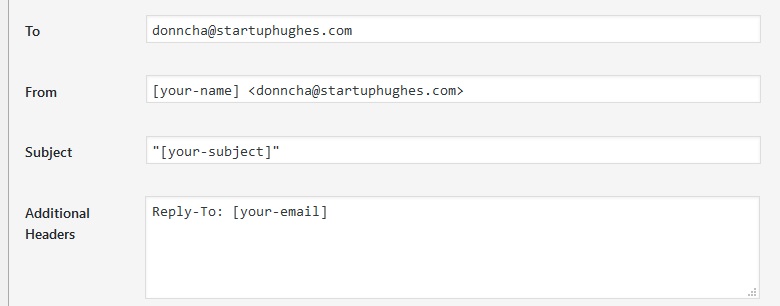
You have to make sure that the email matches the domain of the website. If you want several people in the organisation to receive this email, you would set that up on your email client side. As always, make sure to test that the form are properly set up and working. And keep the plugin up to date!
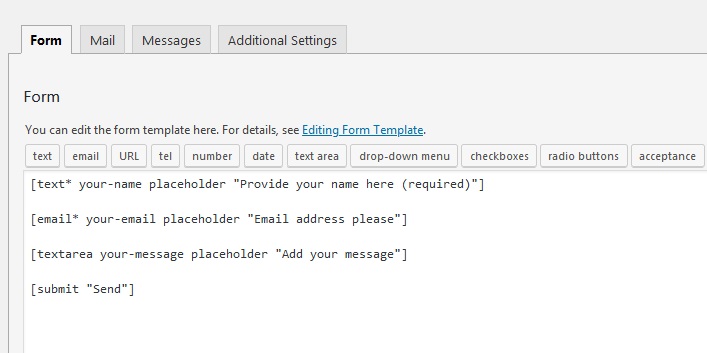
Removing the Placeholder Label (display inside the box)
The code for the Contact Form can be edited so that the Label is placed inside the Placeholder – i think it looks cool particularly if you have a nice background.
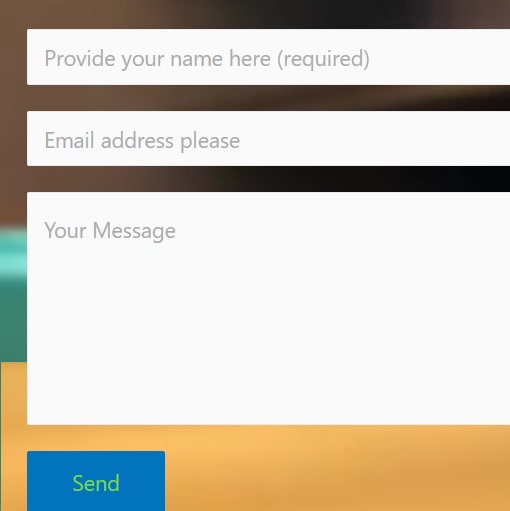
Here is a screenshot of the shortcodes for this configuration… …
Make sure to type in the code correctly and be consistent when configuring the second TAB – MAIL as per image below
More Shortcodes
Many plugins use shortcodes to place a feature in a page or post. Ultimate Shortcodes is a fantastic plugin that activates an array of functionality for your site using specific shortcodes which can be copied into pages or posts to for instance animate text or a heading, or add buttons which you can customise. It is definitely worth checking out.
As always I hope you found this blogpost useful. Comments and shares on social media appreciated.
regards
Donncha (@donnchadhh)
Check out upcoming Training Dates delivered by Donncha Hughes for LEO Galway – SEO and Creating a Business Website using WordPress – book direct via LEO Galway.