
This blogpost outlines how to create a 404 error page that is customised to your business – that can include links to key pages on your site and a contact form plus much more.
The instructions require you to download and activate two plugins:
- Page Builder by SiteOrigin and SiteOrigin Widgets Bundle
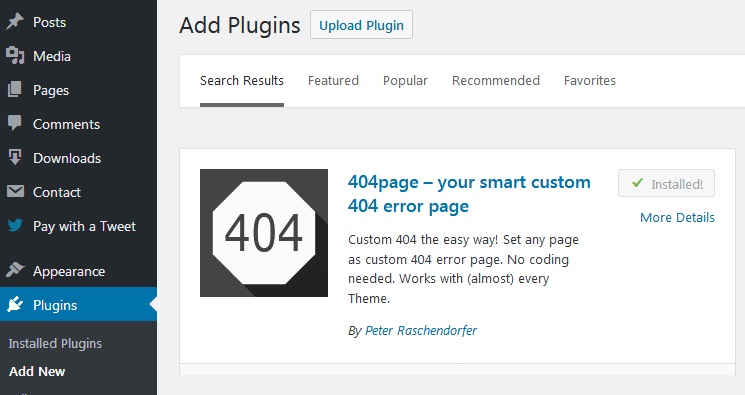
- Plus 404page- your smart custom 404 error page
Download from WP Plugin Directory
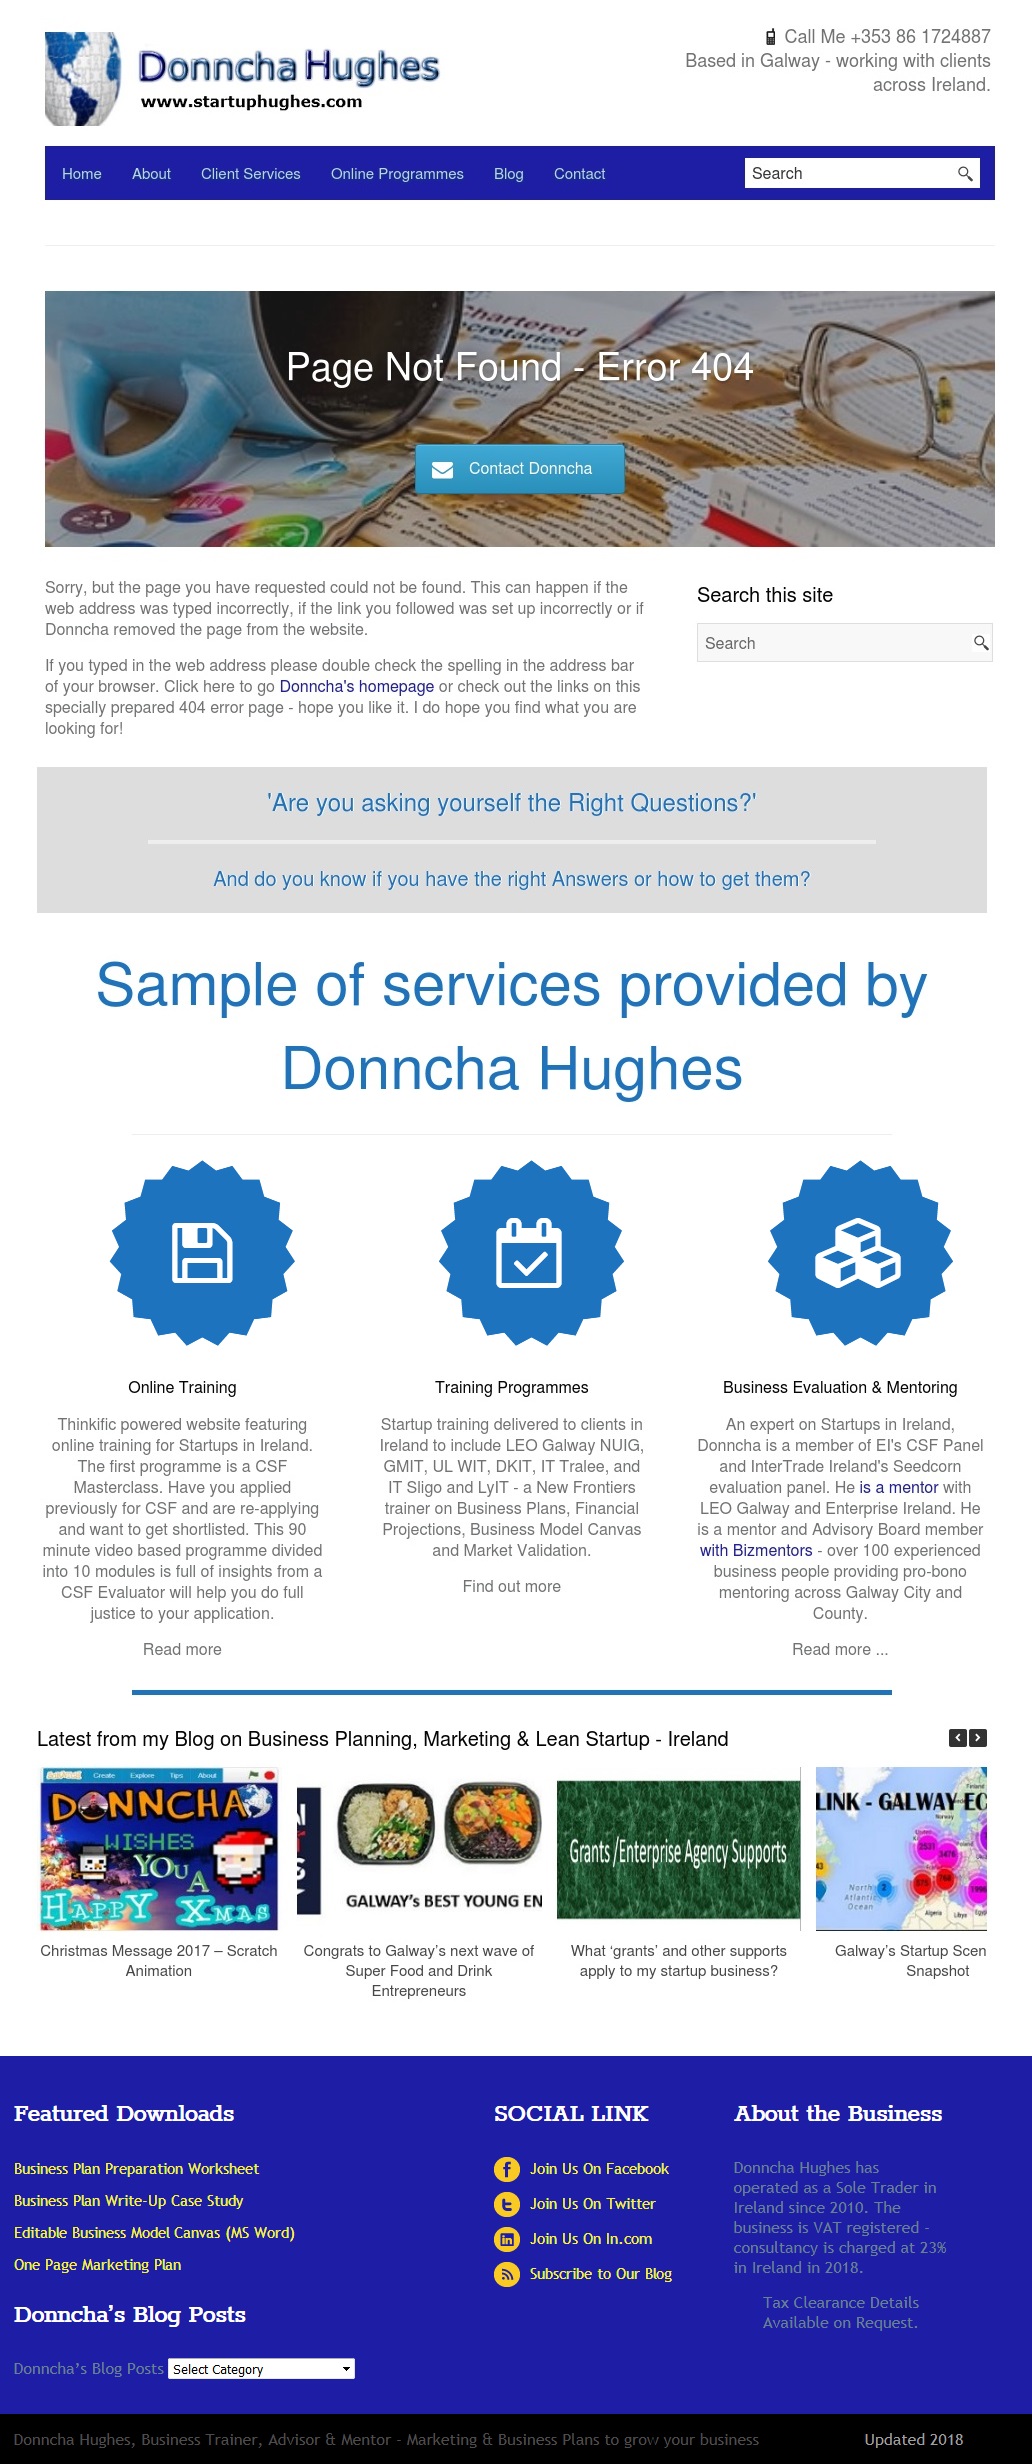
The End Result – a fancy 404 Error Page
Below is a gallery of two images (click to enlarge) displaying the front end 404 page of my other website, while the second image is the back end view using the Page Builder editor. Admittedly this is probably over the top but I want to showcase the SiteOrigin Page builder.
-

- Error 404 Site Origins Editor
-

- Error 404 as appears on website
What is a 404 error page?
This is the main paragraph text of my page
Sorry, but the page you have requested could not be found. This can happen if the web address was typed incorrectly, if the link you followed was set up incorrectly or if Donncha removed the page from the website.
Quick overview of Site Origin Page Builder
YouTube is a fantastic resource for learning about WordPress, Themes and Plugins. There are plenty of videos about SiteOrigin Page Builder to include this one (5 minutes):
There are plenty of other videos to get up to speed with SiteOrigin – and there are several other page builder plugins for WordPress in case you want to Google them! (may work better with your selected theme for instance)
Step by step instructions
- Download the Plugins
Search for SiteOrigin in the WordPress Plugin directory and download the Page Builder and Widgets Bundle.
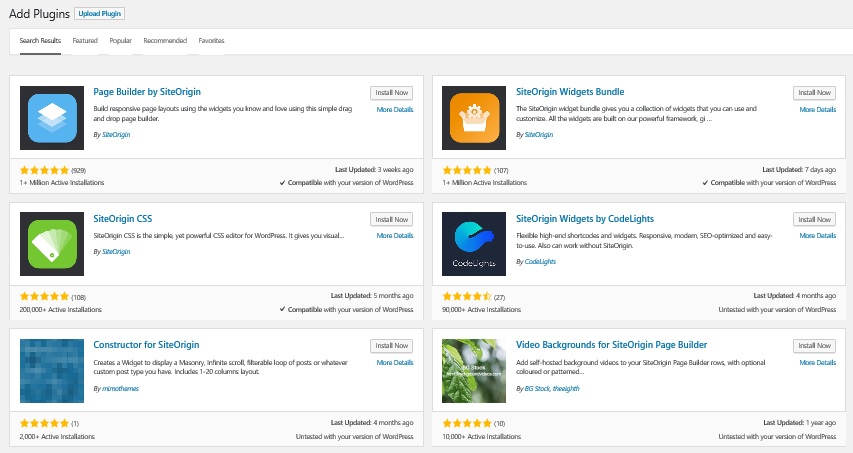
There are several other Siteorigin compatible plugins which add even more exciting and functional widgets to WordPress.
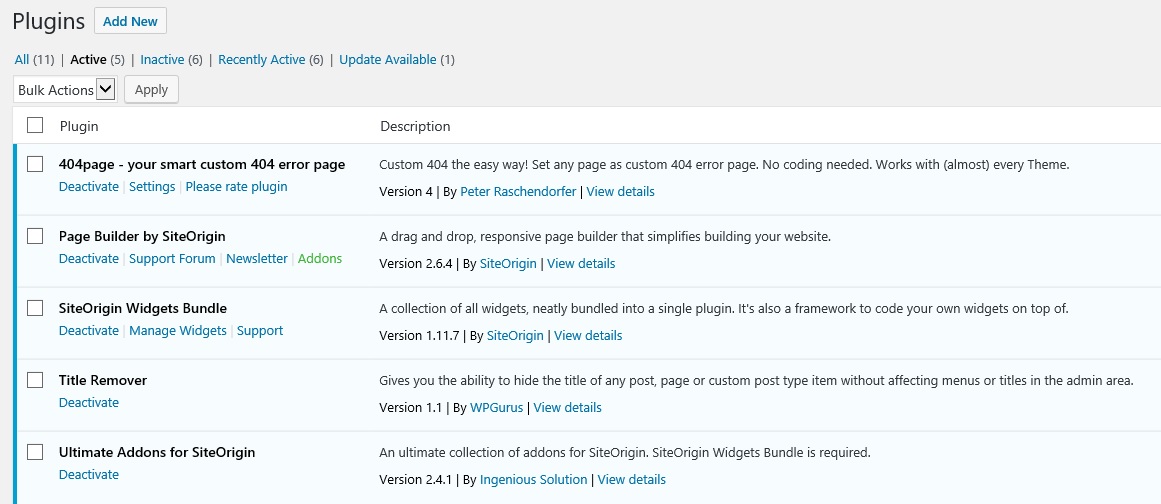
There are 5 plugins listed here – you will definitely need the first three – please activate the plugins.
2. Create a Page that will be your Error Page
>> Pages >>> Add New
3. Access settings for 404 Error Page via Appearance
Set the newly created Error page as your 404 Error Page in the settings of the Error 404 Plugin.
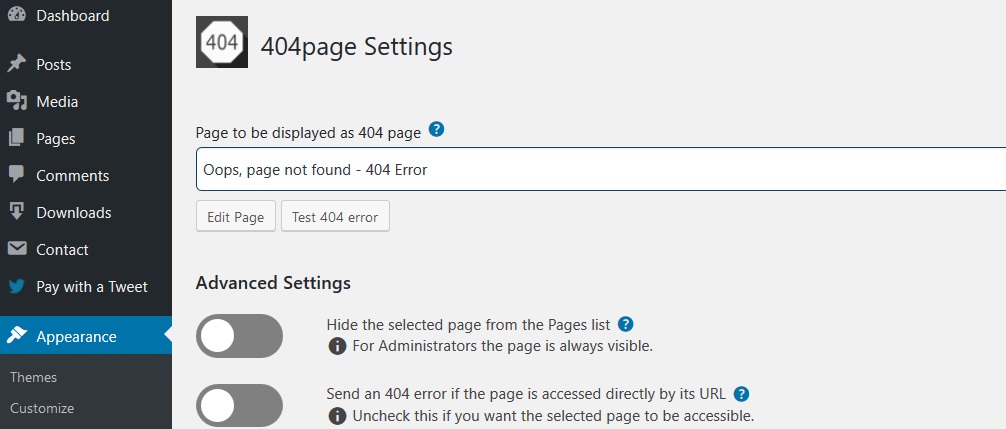
Select your 404 ‘Oops’ page from the dropdown
Click Edit the Page to customise.
4. To create the Page, Site Origins Page Builder is used.
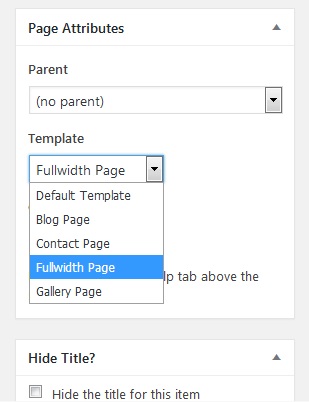
Please note that a Theme compatible with SiteOrigin Page Builder is required – if this is a new website it may be advisable to go with a SiteOrigin theme, to have a look at one like Vantage is recommended. In my case, my Theme was compatible and had the full page width page layout option which is centrally crucial in optimising the design of the page by removing the side bar i.e. makes it look nice!!
ABOUT ROWS
Rows are the starting point with Page Builders. The SiteOrigin video explains how to add rows and then widgets within rows.The start point in any page is to select Page Builder as the Visual Editor.
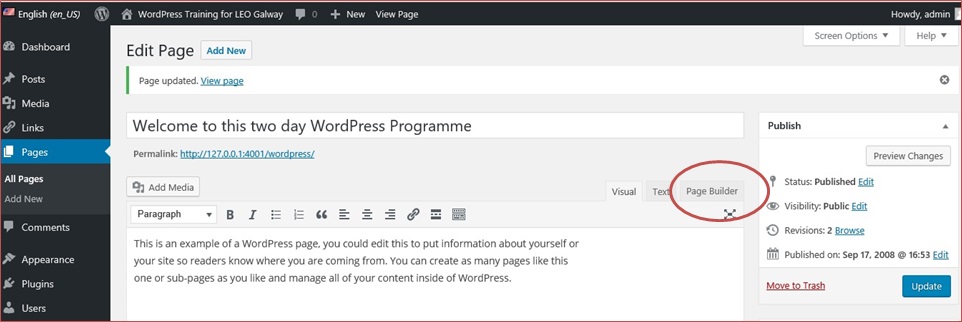
Clicking on the Page Builder Tab, circled in red, activates the Page Builder and allows Rows and Widgets to be added.
There is also a ‘Prebuilt Layout’ option available. This can be very time effective. The prebuilt layouts can be previewed in advance. I find them very interesting in terms of design ideas and figuring out how to configure each of the available widgets. Because rows can be styled:
- Page Attributes – add a Row ID
- Layout – to configure margins, padding and row layout (Full Width v Stretched Full Width)
- Design – to include background colour or image
5. Add Five Rows
For this particular 404 Error Page, 5 rows are needed. These can be moved using ‘drag and drop’. The rows can also be given titles as they are created. You can select how many columns you want in each row and decide on how space each one gets.
Row 1 = One column – A SiteOrigin Hero Image
Row 2 = Two columns – A SiteOrigin Editor and a WordPress Search Widget
Row 3 = One column – SiteOrigin Headline
Row 4 = One column – SiteOrigin Features Widget
Row 5 = One column with two widgets – A SiteOrigin Headline and a Post Carousel
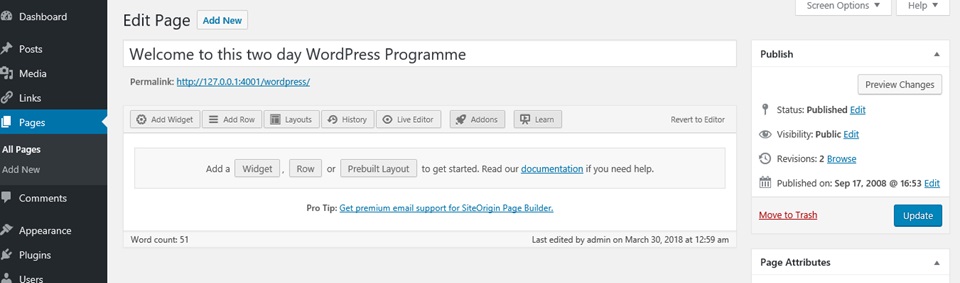
Here is a screengrab of the dashboard screen after the page has been created (repeat of image above) showing the 5 rows and the widgets within each row.
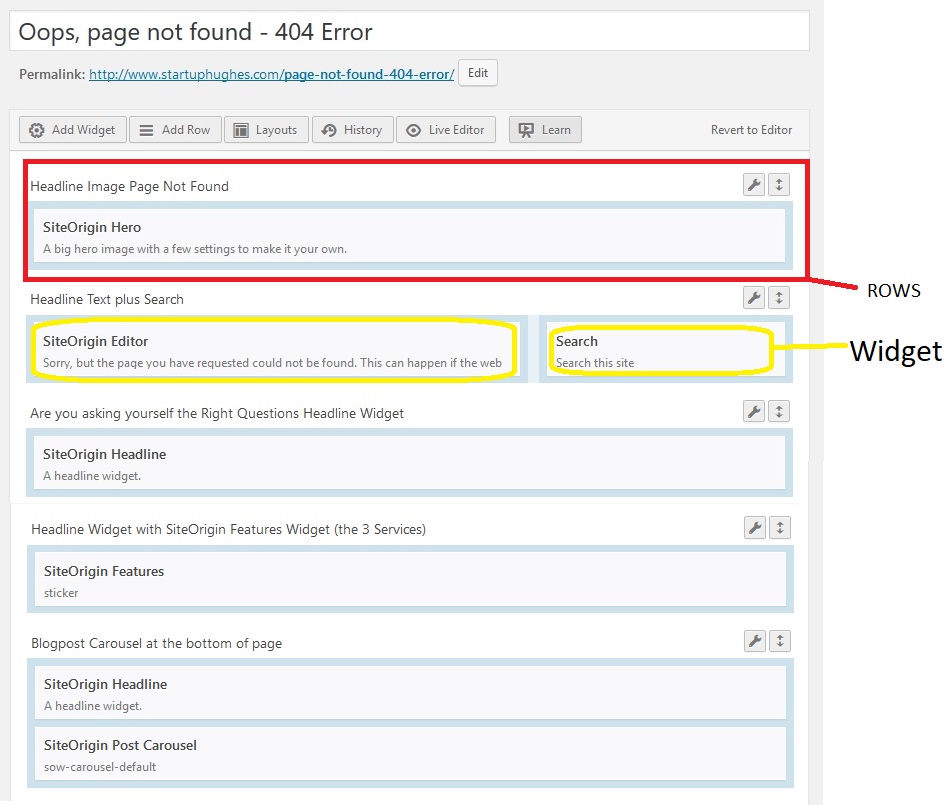
Error 404 Site Origins Editor
6. Add Widgets to your Rows
Widgets are added to rows to provide the design – to save time these can be duplicated and then moved again using ‘drag and drop’.
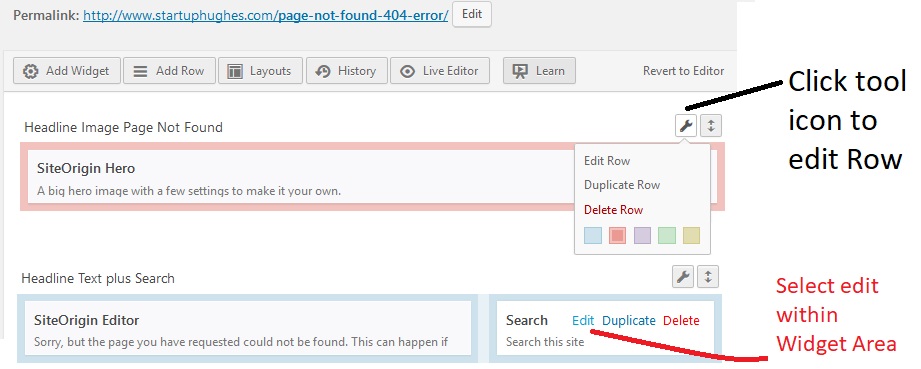
Edit Row to change Row Colour (quick identification)
To add a widget click on the Row and then click Add Widget.
But first:
SITEORIGIN BUNDLE WIDGETS
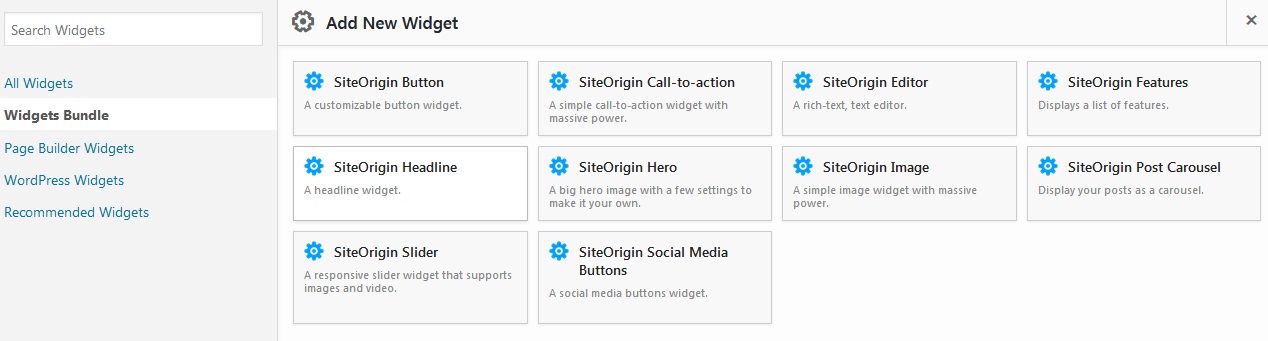
After activating the SiteOrigin Widget Bundle Plugin, you may have to individually activate the Widgets that you want from the bundle – click on SiteOrigin Widget settings which will appear as a sub item within Plugins in the Dashboard.
As you can see there are lots of other Widgets which I did not use – so plenty of options for building functionality into any page or post within WordPress.
7. Add content (and style) to each Widget
The widgets are fairly self explantory but you do need your wits about you – and need to spend time figuring out all the settings and the impact of changes. The preview changes feature (part of Live Eidtor) is handy in this regard. Lets just take a look at the widget in the first row. It is a SiteOrigin Hero. It allows a background image with adjustable transparency to be displayed with Heading writing and buttons given prominence. It is actually a Slider but I have only added one Slide Image or Frame. Apparently, a video can also be played in the background of frames.

Example of Call to Action with Two Buttons
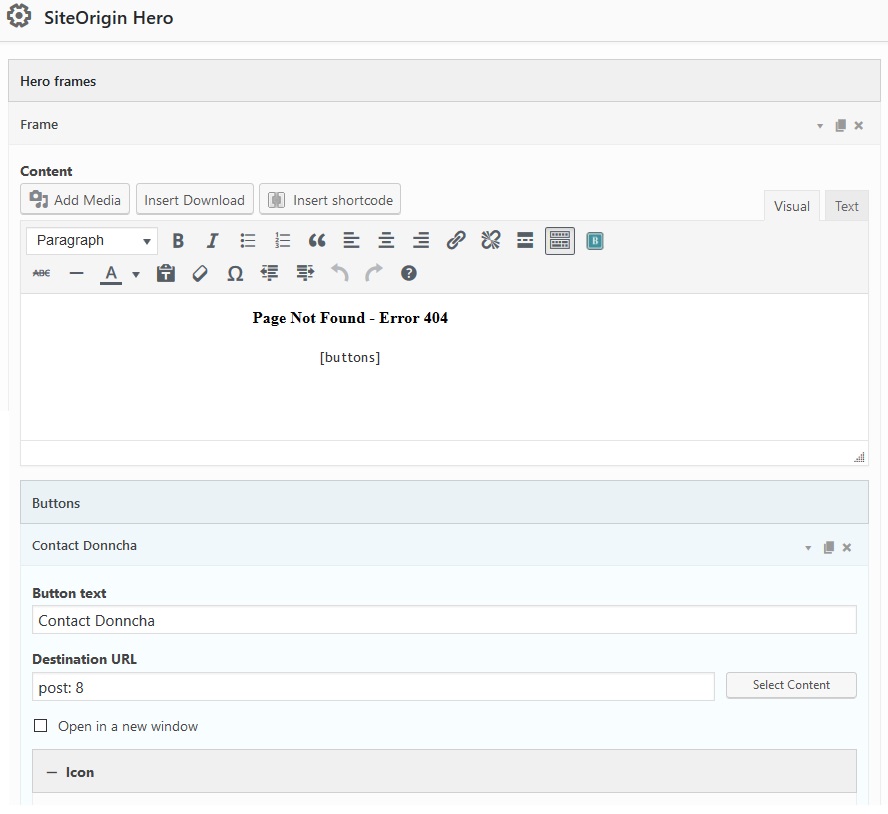
CONFIGURING SITEORIGIN HERO
There are loads of settings within this widget to provide plenty of style customisation The three top level items are Hero Frames, Slider Controls and Design and Layout.
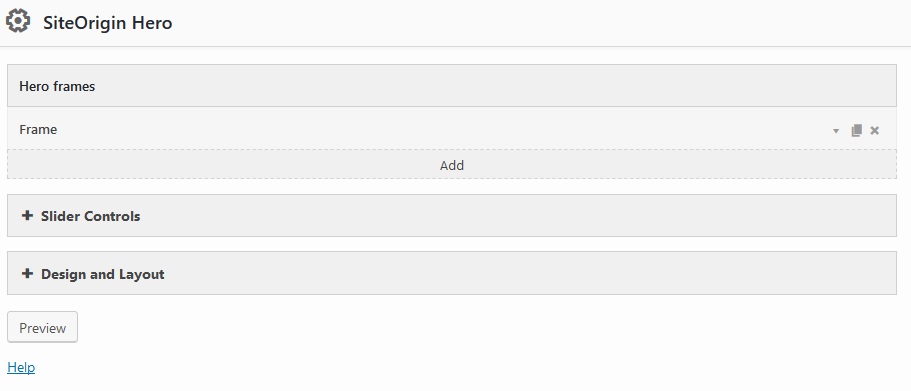
The starting point is to Add a Frame. This allows text to be added as a heading within the Visual Editor of the frame. To activate the buttons you have to include the [buttons] shortcode.
Clicking on Icon allows selection of the Icon which can then be styled in terms of colour, size and links. The section under Icon is Background where the image is set along with image opacity. I set the background image type to Cover from the drop down menu. The final section as you scroll throught settings of this widget is design and layout where font type, size and colour can be selected. Lots of customisation and more than one button can be added.
8. Be careful with your Spacing
The final point in putting your page together is to pay attention to the layout settings in terms of padding around widgets and rows – this creates or removes the space between blocks of content. There is a very useful setting to make the Row Layout Full Width or Full Width Stretched. Worth experimenting with.
Finally, I really like Page Builders. SiteOrigins is a good one. Others particularly Elementor get very good reviews. As I mentioned above, SiteOrigins Widgets offer great functionality to include Contact Forms, Google Maps and Social Media icons – definfitley worth checking out. It allows new websites to be built with a lot less plugins.
Hope you enjoyed this post – comments and social shares welcome.
regards
donncha
p.s I get all my royalty free images from Pixabay – a superb website!!