
If you are wondering how to add an SSL certificate to your existing WordPress website, this post will outline the steps I followed as a Blacknight Hosting customer last weekend for my other website which is now located at HTTPS when it used to be HTTP. The entire process took less than an hour – to include all 3 of these steps.

- Buy your SSL Certificate from Blacknight – they will install it on your chosen domain within an hour.
- Install a Plugin on WordPress to redirect your old Http website to your new HTTPS website
- Tell Google Analytics about the change and in Google Search Console add a new property to add a new sitemap to maintain your SEO.
What is SSL and what is it important?
SSL (Secure Sockets Layer) is an internet security technology for keeping an internet connection secure and safeguarding any sensitive data that is being sent between two systems –
The other reason it is important is that web browsers particularly Chrome are warning visitors to websites that websites without SSL are not secure. This is the message on this website…
Some visitors will be put off by this message and will not remain on the site – all it means is that you shouldn’t share any information with my site. Fortunately, the site does not request any information, personal or otherwise and is perfectly safe to READ. It is for information purposes only.
Step 1 – Buy SSL Certificate
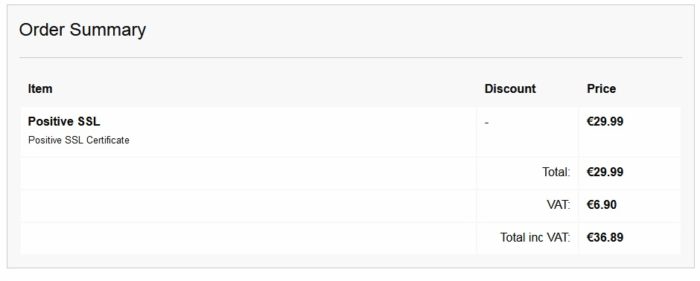
I bought the SSL from Blacknight who host my website. The cheapest SSL is €30 plus VAT a year. It only covers one domain – there are other options to cover multiple domains.
I had read Blacknight’s Knowledgebase articles on How to get an SSL Certificate and install it on your WordPress Site and also How to enable SSL on WordPress … both were very useful. You can
I purchased the SSL Certificate at 4.25 PM on a Saturday. I got an email from help(at)blacknight.com at 5.11 PM confirming that the Certificate had been installed on my domain. The email added that:
To ensure your website is now using SSL you will need to redirect your site to HTTPS:
– If you are using WordPress, a popular plugin that you can install to attempt to resolve this for you is “Really Simple SSL”.
Step 2 – Add WordPress Plugin
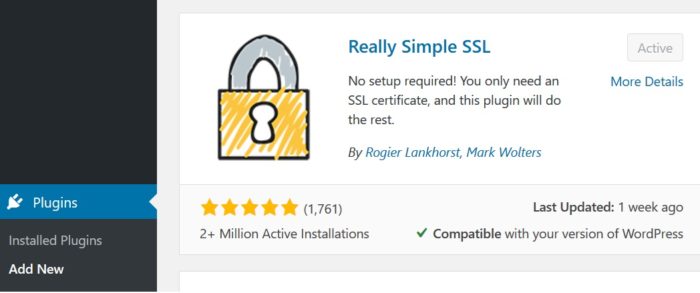
Logging in WP-Admin of WordPress I downloaded ‘Really Simple SSL’ which features prominently in all
The plugin is plug and play. I think I just had to click one button and it found the Certificate installed by Blacknight. I refreshed the browser and the SSL was active. It literally took one minute. This message then appears in the WP Dashboard >>> Settings >> SSL
SSL activated! Don’t forget to change your settings in Google Analytics and Webmaster tools.
Step 3 – Google Analytics
It is very straight forward to change the Web Address in Google Analytics. [See this post on how to set up GA on WordPress]
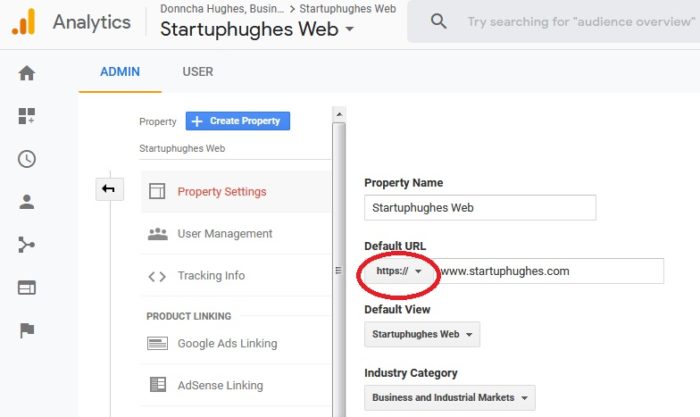
- Log into Google Analytics
- Click on Admin (last item in
left sidebar) - Find the property pertaining to your website and click on Properties (in middle column)
- Click on Property Settings
- Select HTTPs:// in the dropdown
- Scroll to
bottom ofscreen to save changes
Step 4 – Search Console
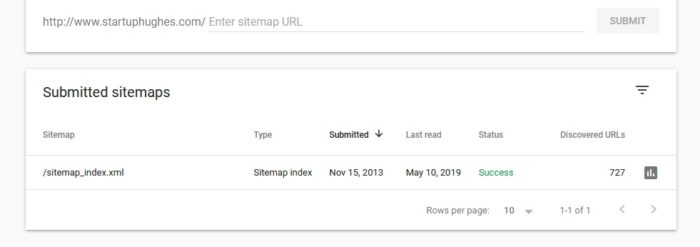
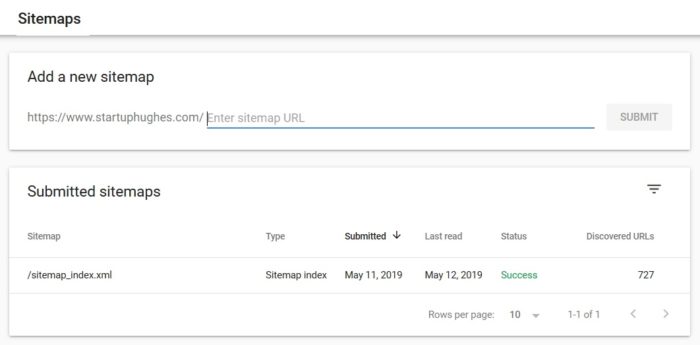
Search Console is used to provide Google with a sitemap. If you have WordPress and you use Yoast SEO plugin then you already have an XML Sitemap which Yoast keeps updated for you. The image above shows that I uploaded my (http) sitemap in 2013. You will need to upload a new one now.
- Login into Google Search Console.
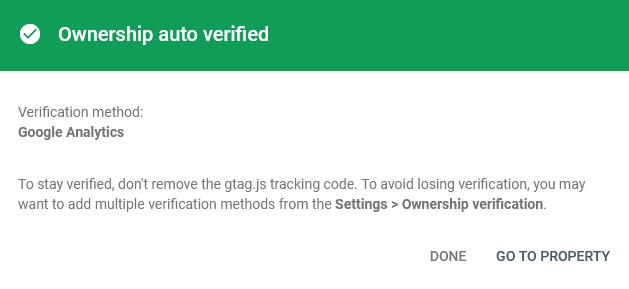
- Create a new Property within Search Console for the new website address. (the internet is initially confusing on whether you have to rename your existing property and submit to Google but my conclusion is that you just create a new property). So click on the current property in the dropdown at the top of the left sidebar and it gives
option to create new Property. - This new property has to be verified. As I was already set up on Google Analytics and had originally verified Search
Cosole via Google Analytics,i selected that option again and thankfully it worked.
4. The sitemap can now be added by opening the new Property and click on Sitemaps in the left Menu. If you have Yoast SEO then sitemap address is simply … /sitemp_index.xml
Those are the 4 steps that I followed to purchase, install and set up an SSL Certificate on my domain along with notifying Google of the change to maintain my SEO. All within about an hour. Hope you found this blog post useful. Comments and social shares welcome.
My final job in this blog post is to add in a previously saved Reusable Block with a Call to Action .. see below.
Check out upcoming Training Dates delivered by Donncha Hughes for LEO Galway – SEO and Creating a Business Website using WordPress – book direct via LEO Galway.