
Adding a Google Map to your WordPress site is relatively easy. You will often see them along with a Contact Form on a Contact Us page or in a footer of a website. This post will provide instructions on how to firstly add a simple Google Map with your location to your Website – if you have a Google Business listing, you will easily find your business. If not a Pin can be dropped to mark the location. The post will then detail how to create a Google map with multiple locations that can be embedded into your website
Google is great as it looks after Directions and allows the user to save places to their own maps account.
Simple Instructions to add your Business Location within Google Maps to your Website
- Open Google Maps
- Search for a place, in this example, it is Galway City but you can get much more specific. If your business is listed in Google My Business, your business will appear when searched.
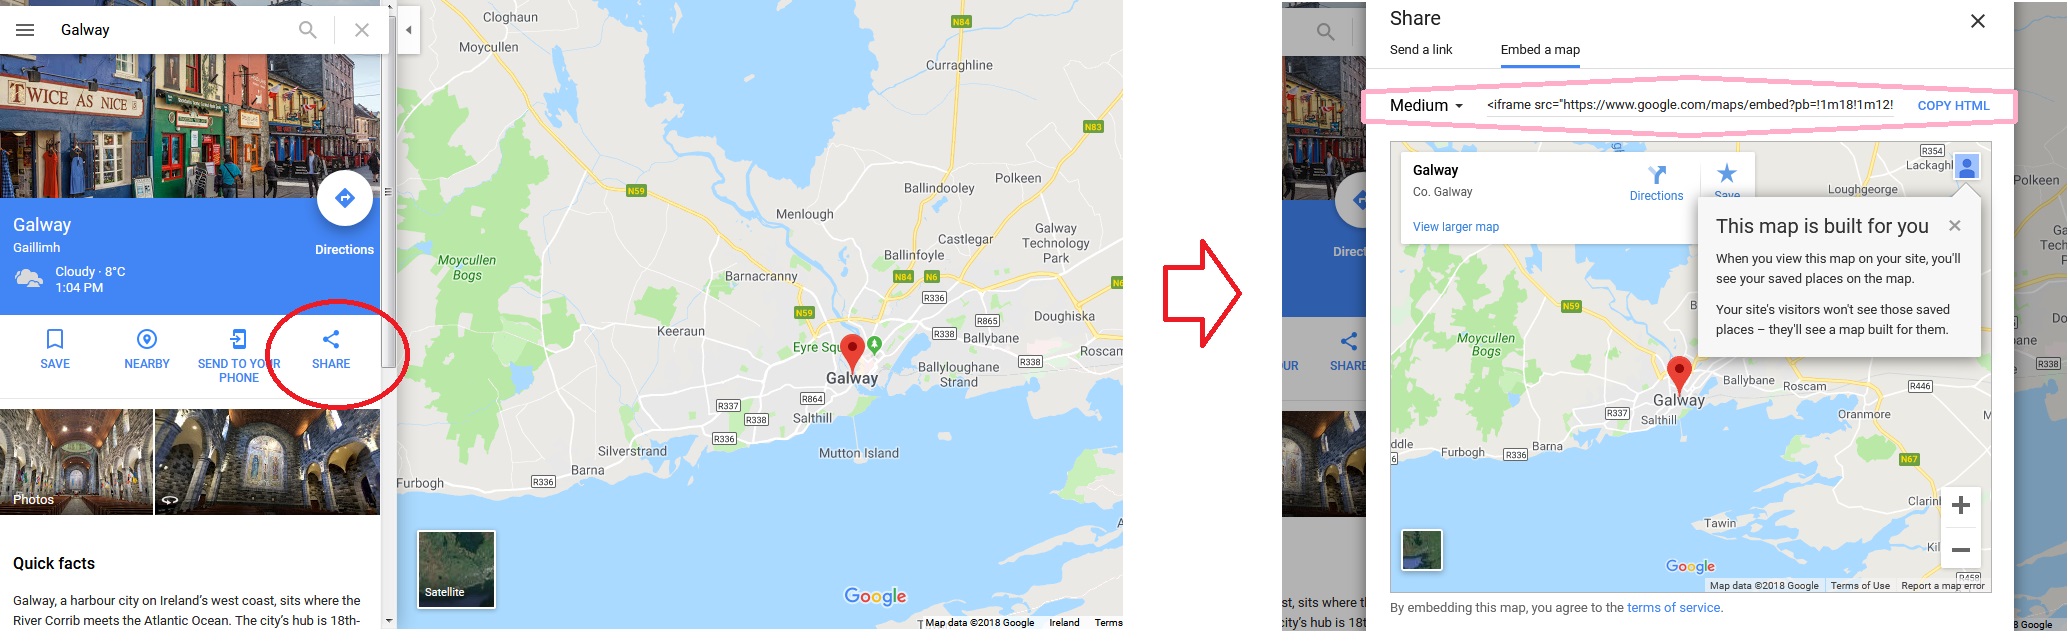
To add a Pin to a Map you just have to Long-press on the screen to drop a pin. The address or location will pop up at the bottom of the screen.Tap on the location to open either share it, save it, or add a label to it. - Click on the Share Button. A pop up map will appear.
- Select the Embed a Map Tab and copy the HTML – see the pink highlight box in image below. You can also change the size of the map in the drop down.
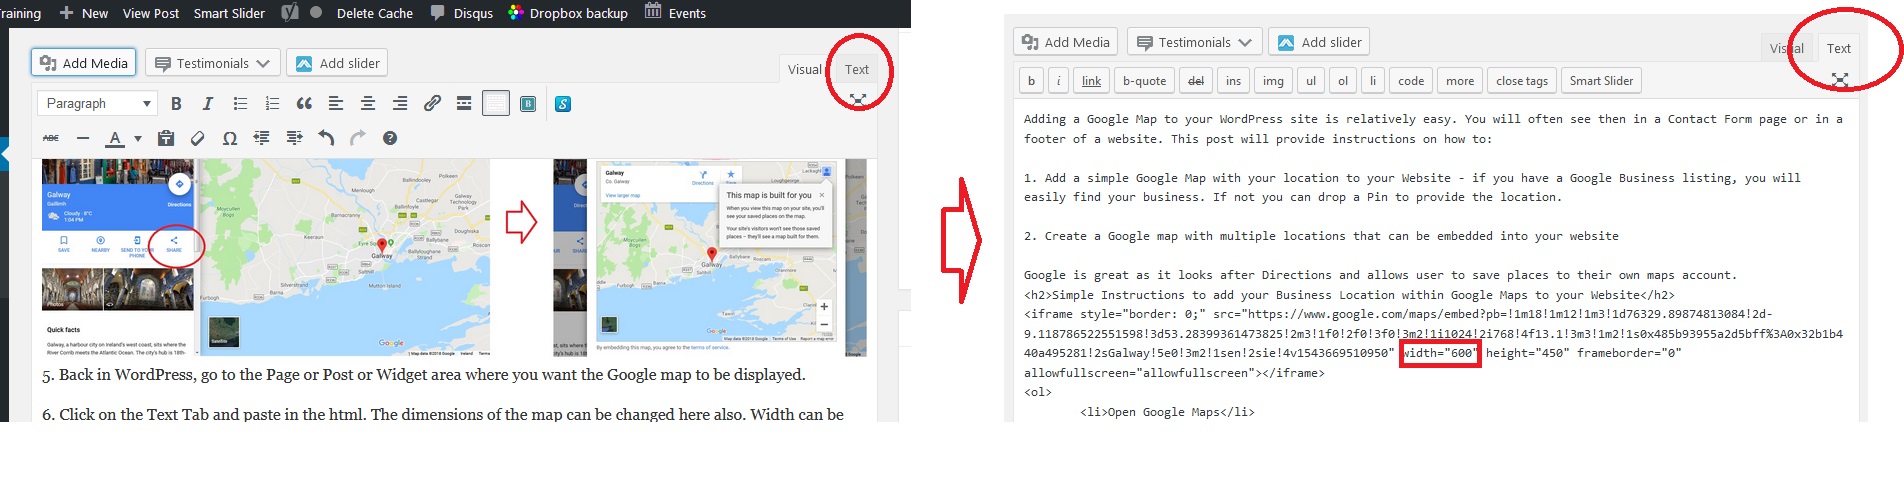
5. Back in WordPress, go to the Page or Post or Widget area where you want the Google map to be displayed.
6. Click on the Text Tab (red circle in image) and paste in the html where you want the Map to appear. The dimensions of the map can be changed here also. Width can be changed to 100% for instance (see red rectangle) – important to do this to ensure map is responsive (appears properly on mobile phone screens)
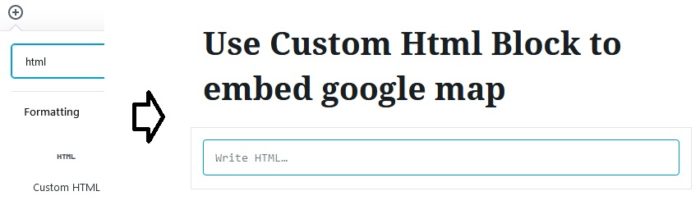
UPDATE January 2019 – with the new WordPress Block Editor, you have two options. The first is to use a Text Widget and follow the instructions above for adding to a page, post, sidebar or footer area. The alternative is to add the following to a page or post: Custom Html Block – use the preview function to test that map is working as intended.
7. If inserting into a Footer Widget a Text Widget will be used. Click on the TEXT Tab to insert the Html code into the text area. When you click on the Visual Tab, your Google Map will be displayed.
Instructions to add multiple locations to Google Map embedded to your Website
- Open Google maps. Sign In.
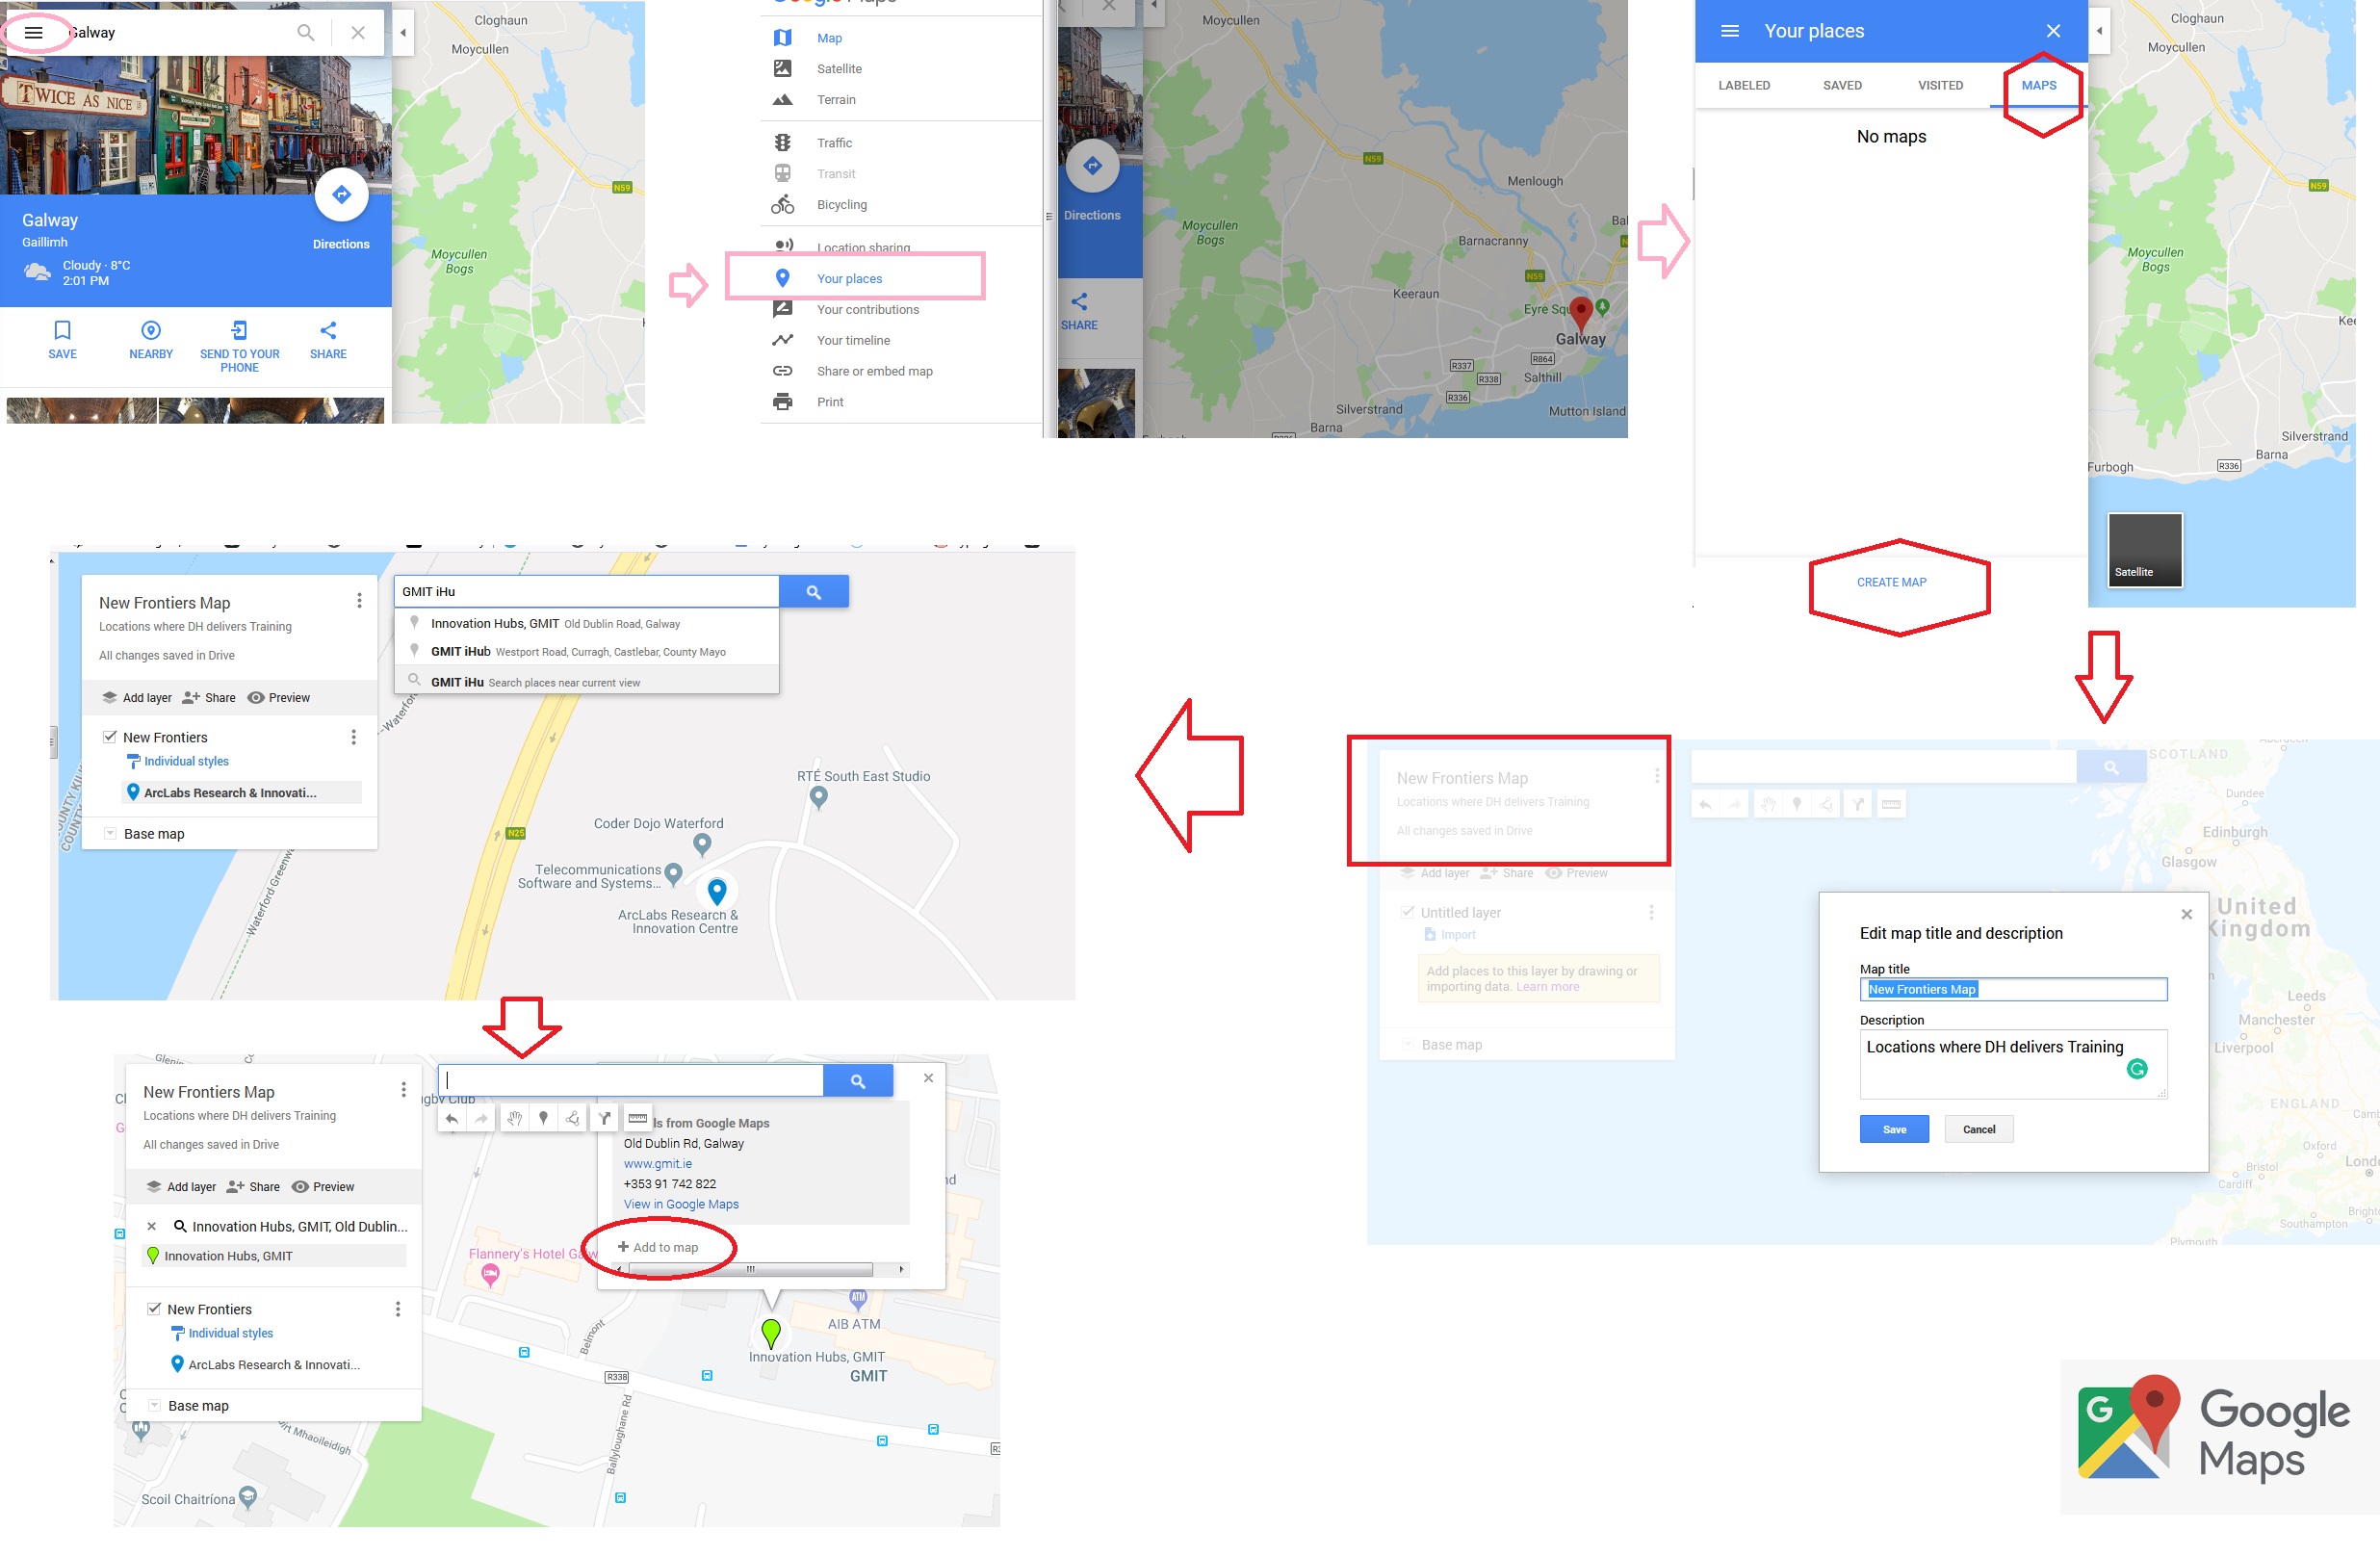
- Within Menu Tab, click on Your Places
- Click on the MAPs TAB in the pop up that appears
- Select Create Map
- Add a Title to the Map by clicking on Untitled Map. You can also add a description
- You can also rename the ‘Untitled Layer’ to something appropriate
- In the Map Search Bar, search for your first location. When you find it select add to Map.
- Add more locations. In image below it shows how the 2nd location was added. ArcLabs, WIT was added first and then GMIT iHubs.
9. Add more locations and Save map. You can preview all the locations. We can now move to Embed this Google Map on a website. Click on PREVIEW icon (pink square in image below)
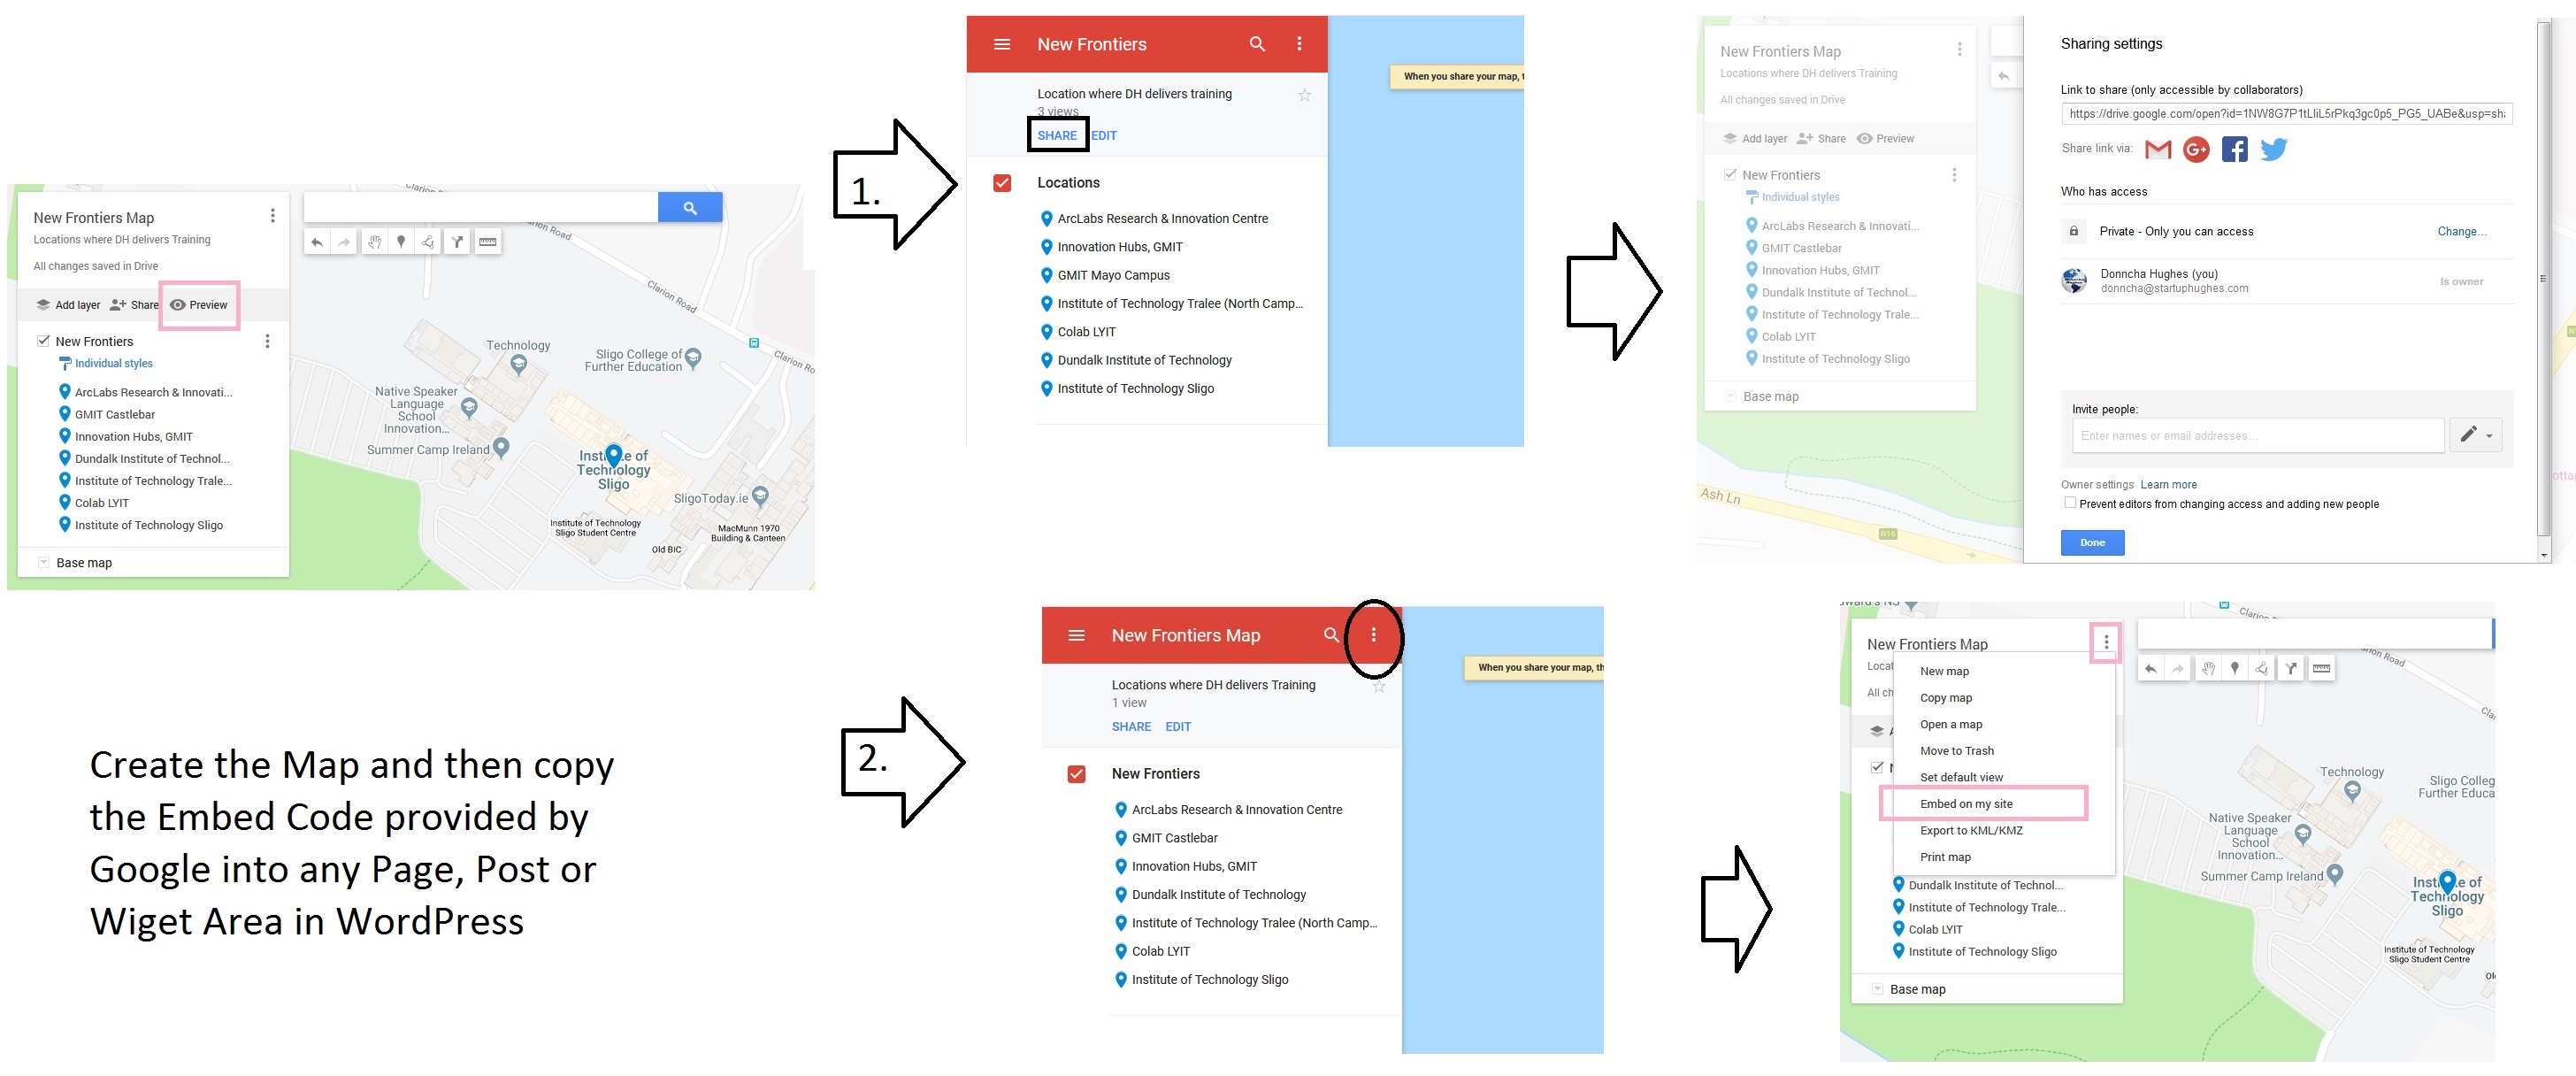
10. Click on the Share button first and change Permissions to Public (step 1 in image above)
11. Click on the Three Dots Menu to find the Embed Option. Copy the HTML (iFrame) Code provided (step 2 in image above)
12. Back in WordPress, add a CUSTOM HTML block and paste in the code provided by Google – in the New Frontiers Map below I have added 3 locations and changed the icons within Google maps for each location. Click on Preview option to test that the map works as intended.
You can change the width and height dimensions of the map to suit your website layout. I increased the default width to 1200 pixels and the height to 600. If the custom html block does not work you can try the CLASSIC EDITOR block and add the html there replicating the old way of embedding in WordPress.Bonus – Plugin to Display a Pdf
WonderPlugin PDF Embed plugin available from the Plugin Directory allows you to display a multi page pdf on your WordPress site – just like the one below. The summary instructions are to: Upload the Pdf to the Media Library, copy the link created for the file, add the Wonderplugin shortcode and replace the link with one from your domain. It will look like this.

By using % for the width attribute, the PDF viewer is responsive. The Pdf document can be Downloaded and/or Printed by accessing the Menu on top right denoted with the double arrow icon >>
Here is the output:
As alway I hope you enjoyed this post. Comments and social shares welcome.
regards
donncha (@donnchadhh)